
Windows Weekly Dockerfile #20: Running Your Own Registry
There are 52 Dockerfiles in the source code for my book, Docker on Windows. Perfect for a year-long blog series.
Each week I’ll look at one Dockerfile in detail, showing you what it does and how it works. This is #20 in the series, where I’ll look at running your own registry server in a Docker container on Windows.
Docker Registry
The registry is the “ship” part of the build, ship, run workflow. You package your app in a Docker image using a Dockerfile and docker image build, and the output is an image on your machine (or the CI server that ran the build).
To make the image available to other users, you ship it to a registry with docker image push. The default registry is Docker Hub, which is a free public registry service. If you want to keep your images private, so they’re only accessible within your own network, you can use a commercial registry like Docker Trusted Registry - which also provides security scanning and image signing.
You can also run your own basic registry server in a container. You won’t get a UI or any of the advanced security features, but you do get a registry server on your fast local network. It’s fine for storing your own images, or storing a local copy of images from Docker Hub.
The registry API is an open standard, so you use your own registry server or a third-party registry in exactly the same way you use Docker Hub.
Docker Registry is an open-source reference implementation of the registry server. It’s written in Go and it works cross-platform. There’s an official Linux image you can use on Docker Hub, but if you want to run on Windows you need to build your own image.
ch04-registry
This week’s Dockerfile does just that, building the registry server from source and then packaging it using a multi-stage build.
The builder stage uses the official golang image for the toolchain, which has a Windows Server Core variant. It starts by capturing a version number and creating a working directory for the source:
FROM golang:1.10.0-windowsservercore-ltsc2016 AS builder

ARG REGISTRY_VERSION=v2.6.2

WORKDIR C:\gopath\src\github.com\docker
The rest of the builder stage is really simple. It clones the GitHub repo where the registry source code lives (the golang image has git installed), checks out the specified version and builds the app:
RUN git clone https://github.com/docker/distribution.git; `
    cd distribution; `
    git checkout $env:REGISTRY_VERSION; `
    go build -o C:\out\registry.exe .\cmd\registry
The GitHub repo is called
docker/distribution, but the app is calledregistry.
The builder is a Windows image, so Go will compile a Windows binary. When that stage completes, there’s a registry.exe in the output directory. The next stage packages that up on top of Nano Server.
I can use Nano Server because the registry is a Go app that doesn’t need the full Windows Server Core runtime. See How to Dockerize Windows Applications: The 5 Steps if you want to understand that decision.
The app stage starts with the 2016 semi-annual channel (SAC) release of Nano Server and sets up some environment variables:
FROM microsoft/nanoserver:sac2016

ENV DATA_PATH="C:\data" `
    REGISTRY_STORAGE_FILESYSTEM_ROOTDIRECTORY="G:\\"
DATA_PATH is used in the container setup to capture a path for a Docker volume, which is C:\data
REGISTRY_STORAGE_FILESYSTEM_ROOTDIRECTORY is used by the registry app to specify where it should store data - this is the location for all the image layers and the metadata, which is set to G:\
Then it has this crazy line to set a value in the Windows Registry:
RUN Set-ItemProperty -Path 'HKLM:\SYSTEM\CurrentControlSet\Control\Session Manager\DOS Devices' -Name 'G:' -Value "\??\$($env:DATA_PATH)" -Type String
That’s how you create a mapped drive in PowerShell. It’s creating a G: drive and pointing it to C:\data. Apps can refer to paths starting G: and Windows will actually use C:\data, which is the path for a Docker volume. So when the registry server writes to the G: drive, Windows actually writes to the Docker volume, which could be an external storage location.
This is a workaround for an issue where apps get confused trying to resolve paths which are Docker volumes. See Docker Volumes on Windows - Introducing the G Drive if you want to learn more.
Next the Dockerfile sets up the integration between the container and the host:
VOLUME ${DATA_PATH}
EXPOSE 5000

WORKDIR C:\registry
CMD ["registry", "serve", "config.yml"]
This creates a volume for storage at the expected data path, exposes port 5000 (which is the default registry API port), and configures the container to start by running registry.exe in serve mode, using the a local config file.
The last part is to copy in the compiled binary and the default configuration file from the builder stage:
COPY --from=builder C:\out\registry.exe .
COPY --from=builder C:\gopath\src\github.com\docker\distribution\cmd\registry\config-example.yml .\config.yml
Usage
It’s the usual thing to get the image. You can either download my public image from Docker Hub:
docker image pull dockeronwindows/ch04-registry
Or you can clone the source for the book’s code samples and build your own version:
git clone https://github.com/sixeyed/docker-on-windows.git

cd docker-on-windows/ch04/ch04-registry

docker image build -t dockeronwindows/ch04-registry .
Either way you’ll get a image which you can use to run the Docker registry in a Windows container:
docker container run -d -p 5000:5000 dockeronwindows/ch04-registry
But for a long-lived registry server, you’ll want to map the volume to a specific place on the host, which makes it easier to upgrade the registry container in future. This example stores all the registry data in the C:\registry-data folder on the host:
mkdir C:\registry-data

docker container run -d -p 5000:5000 `
  -v C:\registry-data:C:\data `
  dockeronwindows/ch04-registry
That’s only the first part of running your own registry though :) The registry runs a REST API which Docker connects with, and by default Docker wants a secure connection. Your registry container is using HTTP, not HTTPS.
You can configure the open-source registry to use HTTPS, but it takes a little more work. The Windows Registry lab on GitHub shows you how to do it.
If you’re running in a private network, or if you’re cavalier about security, you can configure Docker to connect to the registry over HTTP . The setting you need is allow-insecure-registries, and the easiest way to configure it is with the UI in Docker for Windows:
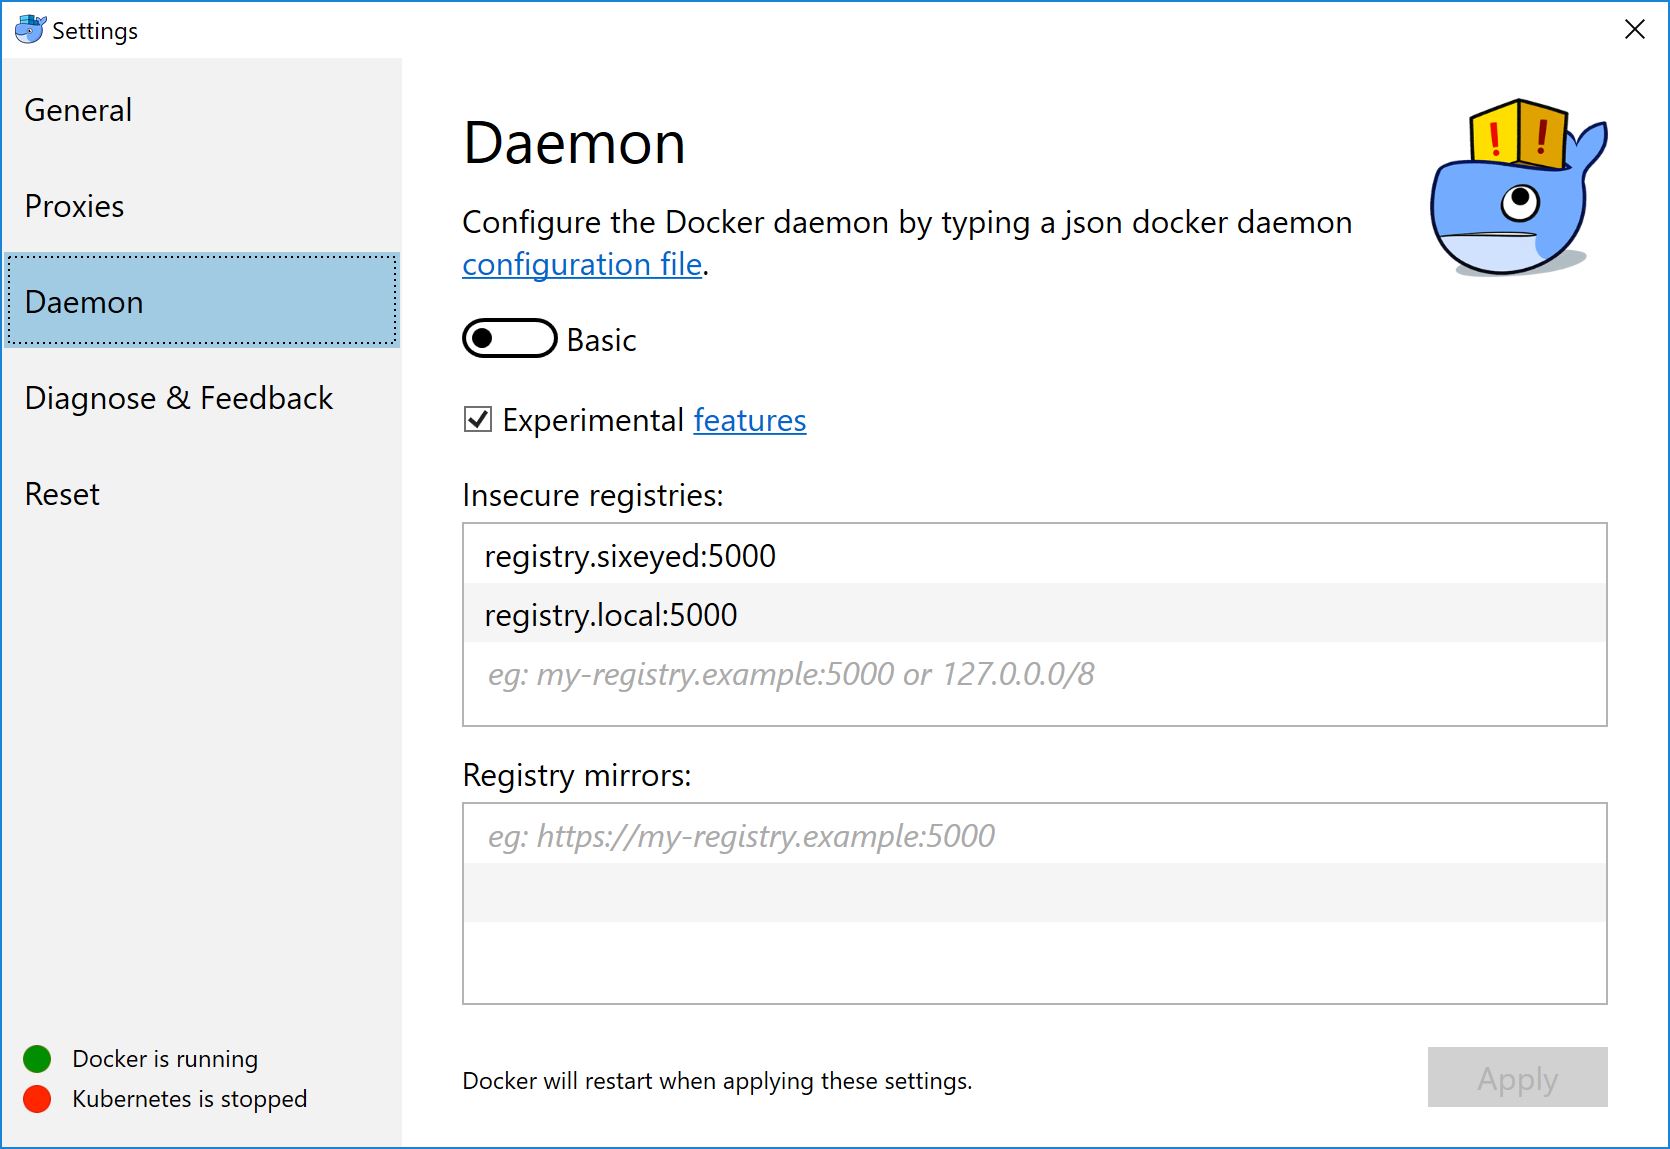
That actually stores the setting in Docker’s config file at C:\ProgramData\Docker\config\daemon.json:
"insecure-registries" : [
    "registry.sixeyed:5000",
    "registry.local:5000"
  ]
You can see any insecure registries that are configured from
docker infotoo.
I’ve added my local registry address registry.local:5000 as an insecure registry (registry.sixeyed:5000 is another registry container which I have running on a Windows Server machine). That registry.local address is set in my hosts file - this is a much better option than using an IP address for an insecure registry. The hosts entry could point to 127.0.0.1, or a container IP address, but is more likely to point to a real Windows Server IP on your network.
Working with Private Registries
Now you can push and pull images to your registry with abandon. But your image tag needs to include the registry domain (or IP address if you insist), and port.
Docker images can have up to four parts in the repository name: {registry-domain}/{account}/{image}:{tag}. Local images can have any name - you can build your own image called microsoft/nanoserver, but you won’t be able to push it to Docker Hub because the account is microsoft, and you don’t have write permissions.
The tag is optional and defaults to latest, and the registry-domain part is optional too - it defaults to Docker Hub. So microsoft/nanoserver is actually a short version of the full name docker.io/microsoft/nanoserver:latest.
To push to a custom registry, your tag needs to include the domain name. You can do that with the --tag option in the docker image build command, or you can add a new tag to an existing image with docker image tag. This adds my local registry domain to the registry image, so I can store my registry image in my registry:
docker image tag `
 dockeronwindows/ch04-registry `
 registry.local:5000/dockeronwindows/ch04-registry
Now my image has a tag that includes the registry domain, registry.local:5000/dockeronwindows/ch04-registry. That’s enough detail for Docker to know that it’s going to a custom registry, and I can push it there:
docker image push `
 registry.local:5000/dockeronwindows/ch04-registry
The image layers get pushed to your local registry in the same way as when you push to Docker Hub:
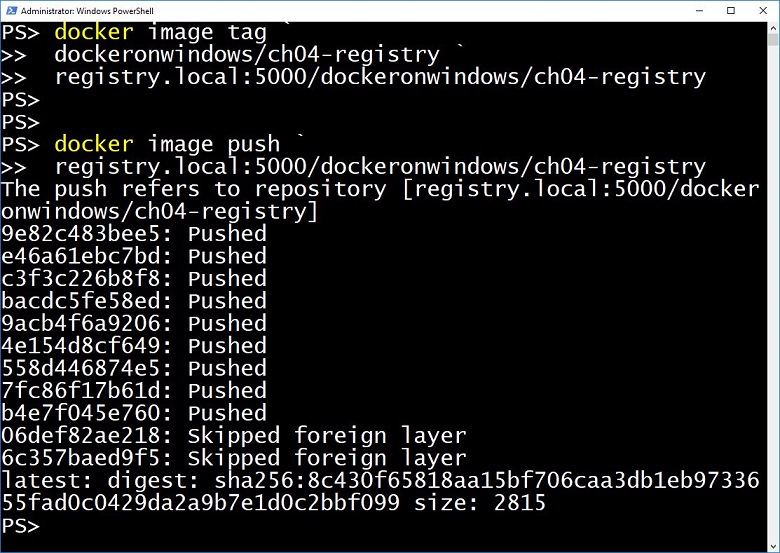
Docker Registry uses the same smart layer caching as your local version of Docker, so if your Docker images are optimized to make use of the cache, you’ll save network traffic and disk space in the registry too (existing layers get re-used if there’s a cache hit).
Those layers are stored in a Docker volume, or at a known location on the host if you run the container with a volume mount. Mine is writing to C:\registry-data on the host, and the tree command shows me the nest of subdirectories where the registry stores the layers:
PS> tree
Folder PATH listing for volume Local Disk
Volume serial number is 9AE0-64CC
C:.
└───docker
    └───registry
        └───v2
            ├───blobs
            │ └───sha256
            │ ├───04
            │ │ └───04f5dd49765ac9ea252ccb44...c
            │ ├───1c
            │ │ └───1cefc1b4fa900dec68ab899c...7
...
You can push and pull from the registry, but there are no extra features with the OSS registry server. If you want to see what images you have, you’ll need to use the registry api. This lists all the repositories in the registry:
PS> (iwr http://registry.local:5000/v2/_catalog).Content

{"repositories":["dockeronwindows/ch04-registry"]}
Next Up
There was only one image in Chapter 4 (but there’s a very useful discussion on commercial registries - including DTR - which you should definitely read on your way to production). Next week it’s on to Chapter 5, Adopting Container-First Solution Design which Manoj particularly enjoyed.
We’re back onto Nerd Dinner to see how we can use Docker to modernize a legacy monolithic application. ch05-nerd-dinner-web makes some changes to the app to load configuration settings from environment variables.


Comments